Docx files for personal book: Verbum 9 part 1; Verbum 9 part 2; How to use the Verbum Lectionary and Missal
Verbum 8 tips 1-30; Verbum 8 tips 31-49
Please be generous with your additional details, corrections, suggestions, and other feedback. This is being built in a .docx file for a PBB which will be shared periodically.
Previous post: Verbum Tip 4ao Next post: Verbum Tip 4aq
My apologies that the outlining and numbering did not transfer correctly and does not appear to be correctable in this system.
Bible browser
From Verbum Help (omitting the erroneous first paragraph):
[quote]The Bible Browser allows users to explore and interact with the biblical text while discovering connections within it. The Bible Browser features a main content pane displaying Bible verses or pericopes that match selection criteria defined by the data in the sidebar on the left. Each selection criterion, such as Bible Book or Person, is called a "facet," because it is one aspect of information that you can use to narrow down the list.
<image omitted>
If a user selects People > Jesus in the Bible Browser, the main panel will display all pericopes containing references to the person Jesus. At a basic level, the Bible Browser lists either verses or pericopes from the Bible. As facets—which appear in the resulting list—are selected, the list gets smaller and more specific, and so does the list of facets. It’s a way to start big and quickly focus in on a small number of passages.
To access the Bible Browser, click Tools > Reference > Bible Browser.
The panel toolbar features options to:
• Select which Bible they want the Bible Browser to display
• Search for relevant pericopes
• Toggle the available Visual filters on or off
• Choose whether results are presented by Verse or Pericope
• Send the displayed results to a new Resource Panel, Passage List document, or Search Panel by clicking the Send to button
• Access Panel History and navigate through the panels that have been displayed.[1]
Heading information for the floating window into which the Bible Browser opens by default.
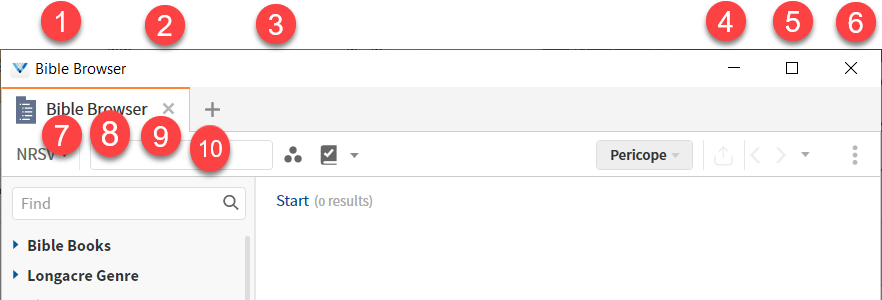
Because the Bible Browser opens in a floating window, the first bar of data is the standard windows title bar.
- The title bar begins with an application icon and a window title e.g., Bible Browser.
- One can grab the title bar to move the window.
- Double-click on the title bar to expand the window to full screen.
- This is followed by a status area for warning and error messages.
- Next is the bar space itself from which one can open the window (title bar) menu which is also available through the Alt+Spacebar keyboard shortcut.
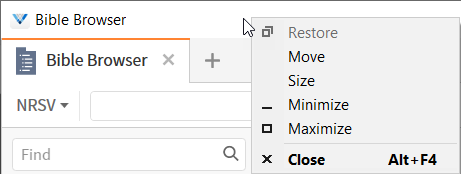
This menu allows one to:
Restore the window to its standard size.
- Move the window.
- Size the window.
- Minimize the window to the task bar.
- Maximize the window to full size.
- Close the window which may be done through the menu or through the Alt+F4 keyboard shortcut.
The minimize icon.
The maximize icon.
The close icon.
In the floating window, there is a single pane with a single panel (tab). The active tab is indicated by an orange line on the top of the active tab.
An icon and a tool name identify the panel. Mouse-over either provides the tool name.
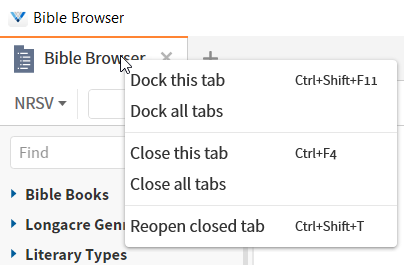
This menu allows one to:
Dock this tab (or via Ctrl+Shift+F11)
Dock all tabs
Close this tab (or Ctrl+F4)
Close all tabs
Reopen closed tab (Ctrl+Shift+T). This is a keyboard shortcut you may wish to remember as many of us accidently close a tab.
X closes the tab
+ allows one to add a new tab through a menu based on your history and priorities. As such, the page deserves it’s own explanation.
The next bar is the panel tool bar, a bar with many drop down options:
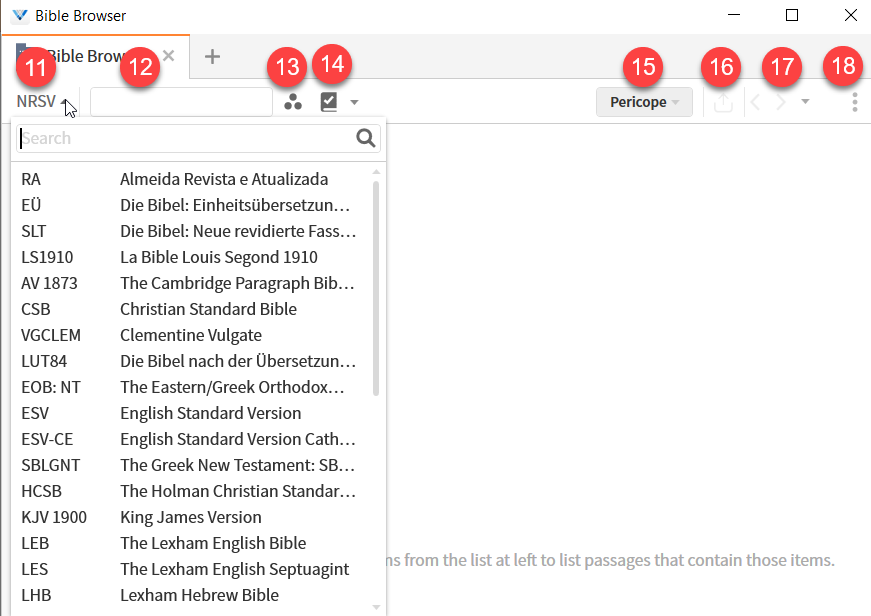
There is a pick list for choosing the Bible version on wishes to use in the browser. A Bible must have an interlinear (original language) or reverse interlinear (translation) to be included. That does not mean that when a reverse interlinear is created, the Bible immediately makes it into the Bible Browser. A Suggestion in the forums or Feedbear may be required. The drop down menu includes:
A search input box – you may enter either the abbreviated or the name of the Bible
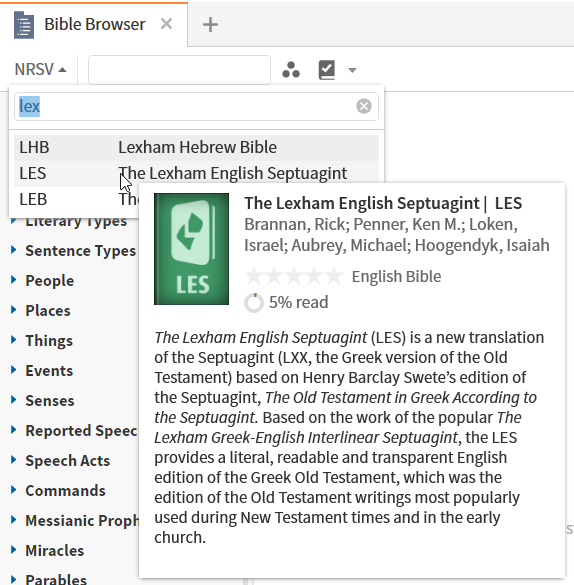
When one begins to enter a title, the available Bibles are filtered and the circle-arrow go-icon is replaced by a circle c clear-icon.
Mouse-over either the abbreviation or the Bible title shows a popup resource information:
i. Thumbnail book cover
ii. Title of Bible
iii. Pipe character
iv. Abbreviated title of Bible
v. Editors and/or translators and/or authors
vi. Rating
vii. (Library metadata) Language + resource type for Bibles, otherwise, resource type or omitted
viii. Reading progress
ix. Description
The reference box shows the active Bible reference when one exists.
The Visual Filter controls most auto-highlighting in resources. The dropdown menu is divided into several submenus.
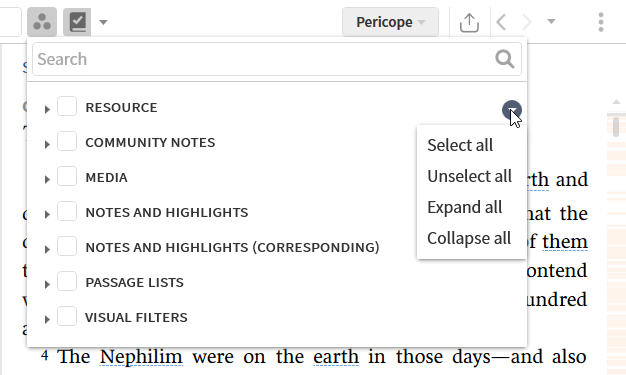
The Visual Filter Menu has a search box with the usual filtering function and switch of the final icon to a clear icon.
The submenus are resource, community notes, media, notes and highlights, notes and highlights (corresponding), passage lists, and visual filters. The header bar for each of these subsections, has a menu available when one clicks on the icon at the far right of the header bar. It provides the following options for the elements below the subsections:
i. Select all
ii. Unselect all
iii. Expand all
iv. Collapse all
One must select the submenu to have the filters and sub-submenus be selectable
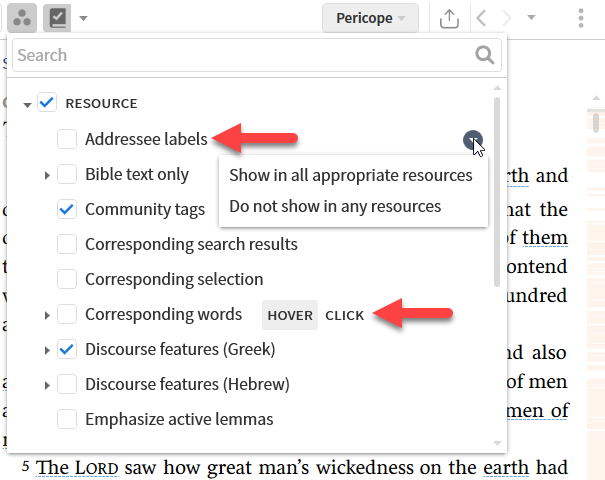
i. Addressee labels are a label we have discussed above. The visual filter for Addressee labels adds a people icon to the text; it is frequently used with the Speaker label visual filter which adds a megaphone icon to the text. Again, there is a dropdown icon on the far right of the visual filter line that provides these options:
Show in all appropriate resources
Do not show in any resources
ii. Note that some filters allow one to select whether the highlighting appears on hover or click.
The remainder of the visual filters will be discussed as the features they support are discussed.
The Factbook Visual Filter is independent of the Visual Filters icon. It provides highlights and modifies the mouse-over and click behavior of certain words. When on, there is a light gray square surrounding the square icon; when off, the light gray square disappears.
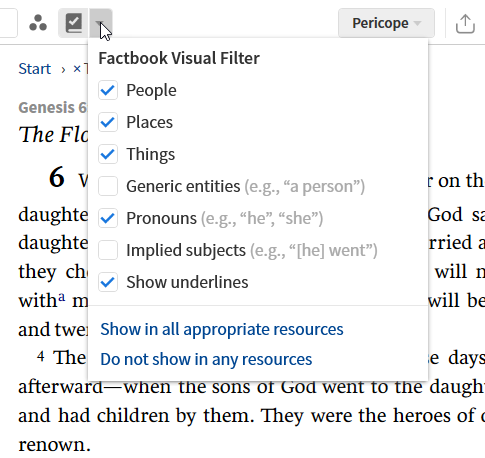
People i.e., Biblical Person datatype (excluding generic entries)
Places i.e., Biblical Place datatype (excluding generic entries)
Things i.e., Biblical Thing datatype (excluding generic entries)
Generic entries that were excluded from the three Biblical entity classes.
Pronouns converted to their antecedent via the Referents dataset.
Implied subjects, implied by the morphological analysis of the verbs, converted to their antecedent via the Referents dataset.
Show underlines – a simple toggle of the blue underline for the items selected above. The mouse-over and click behavior remain without the blue visual signal.
Show in all appropriate resources sets all resources with the Factbook Visual Filter to the values set here. If not selected, this selection applies only to the current resource.
Do not show in any resources allows the user to turn off the Factbook Visual Filter in all resources having the option.
The next option determines if the results shown in the Bible Browser will be shown by pericope or verse.
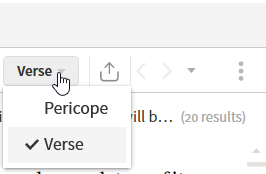
The selected option is indicated by the check mark. Pericope is an option only when the chosen original language text or translation has pericopes.
The Send to option’s menu provides three options:
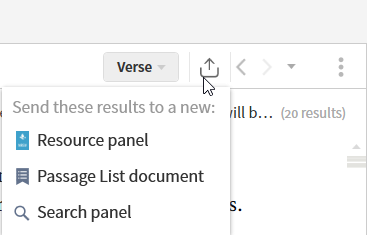
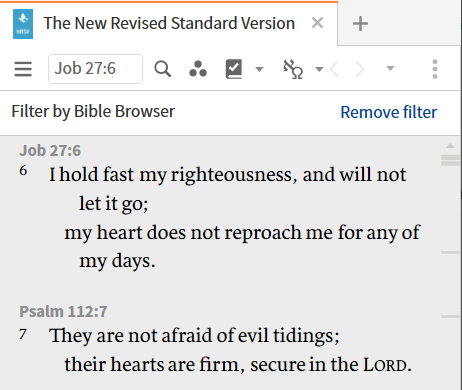
Resource panel opens the selected Bible filtered by the Browser results. This parallels the ability to filter a Bible by a Passage List.
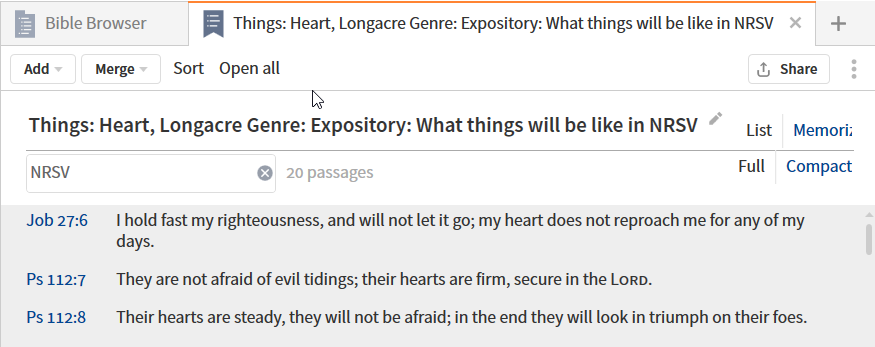
Passage list document creates a Passage list containing the references in the Bible Browser results.
Search builds a Bible search without a search argument but limited to the references in the Bible Browser results
The history segment of the Bible Browser tool bar reflects the history of a specific session of Verbum. It contains:

The left point caret moves one back to the previous Bible Browser display.
The right point caret moves one forward to the previous Bible Browser display.
The drop-down menu shows the history that is being navigated. One can select any entry to move to it.
The final item on the tool bar is the standard Panel Menu.
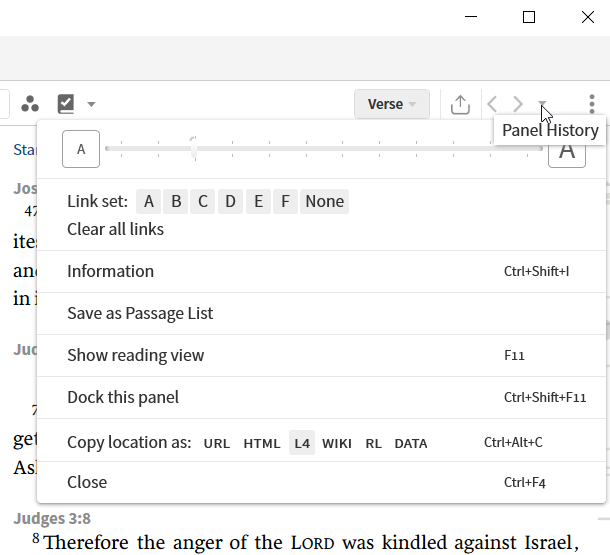
i. The top item in the menu is a slider to resize the text. The default is shown by a longer line. An arrowhead reflects the current setting.
The link set is useful only if you are using the Bible Browser as the driver – another Bible or commentary will follow the Bible Browser references. Going the other direction will often result in a reference not found in the Bible Browser leading to “unpredictable” results. The wording based on the numerous forum posts written by individuals hitting this issue in one of its many permutations. A Link set is two or more resources sharing an index type and a link set identified by a common letter.
Clear all links clears the links in all members of the link sets; “none” clears the link sets only for this resource and leaves other members of the sets
The Information panel option (Ctrl+Shift+I) display the standard information:
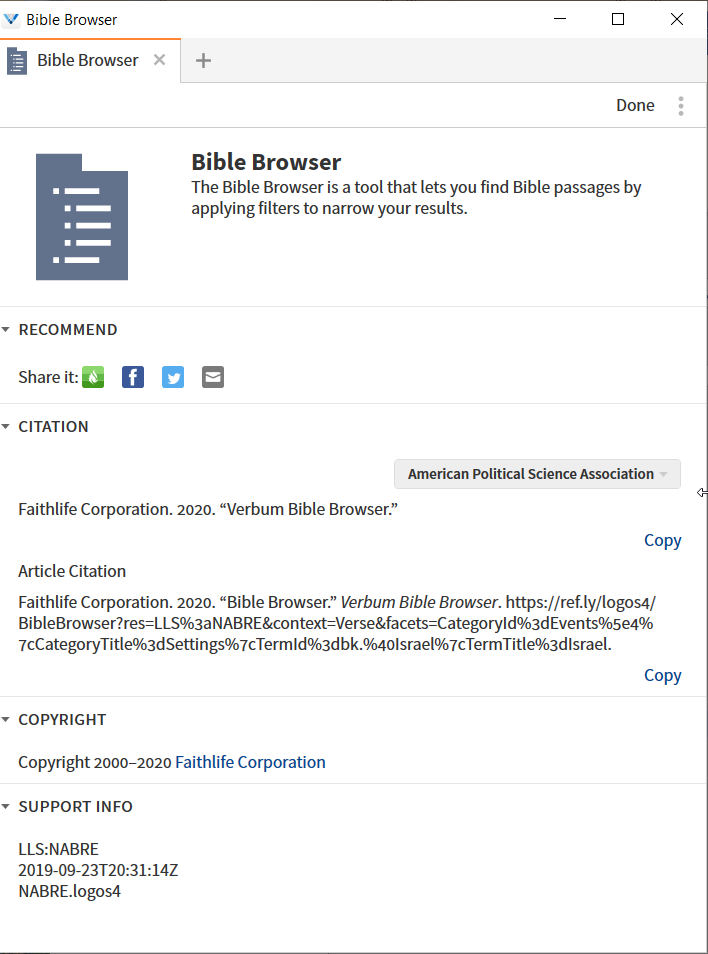
i. Top section: thumbnail tool icon, title, description
ii. Recommend: links to Faithlife, Facebook, Twitter, and email
iii. Citation: citation formatted for resource or article within resource in your choice of 18 styles.
iv. Copyright information
v. Support information
Save as Passage List duplicates Send to Passage List option.
Show reading view (F11) a.k.a. full screen mode
Dock the panel (Cntrl+Shift+F11) i.e. add this panel to the main window (non-floating window) of the application. When docked, this option becomes Float this panel.
Copy the location in one of these formats. The example is based on Theophany à Beholder à Abraham and Place à
i. URL (formatted for email or web) -- https://ref.ly/logos4/BibleBrowser?res=LLS:NABRE&context=Verse&facets=CategoryId=Theophanies^2|CategoryTitle=Beholder|TermId=bk.#Abraham|TermTitle=Abraham;CategoryId=BkPlace^1|CategoryTitle=Places|TermId=bk.@Mamre|TermTitle=Mamre%20(campsite)
ii. HTML (formatted for HTML)-- <a target="_blank" href="https://ref.ly/logos4/BibleBrowser?res=LLS:NABRE&amp;context=Verse&amp;facets=CategoryId=Theophanies^2|CategoryTitle=Beholder|TermId=bk.#Abraham|TermTitle=Abraham;CategoryId=BkPlace^1|CategoryTitle=Places|TermId=bk.@Mamre|TermTitle=Mamre%20(campsite)">Beholder: Abraham › Places: Mamre (campsite) by Verse in NABRE (Bible Browser)</a>
iii. L4 (link for Verbum to use directly bypassing the web) -- logos4:BibleBrowser;res=LLS:NABRE;context=Verse;facets=CategoryId$3DTheophanies$5E2$7CCategoryTitle$3DBeholder$7CTermId$3Dbk.$23Abraham$7CTermTitle$3DAbraham$3BCategoryId$3DBkPlace$5E1$7CCategoryTitle$3DPlaces$7CTermId$3Dbk.@Mamre$7CTermTitle$3DMamre$2520(campsite)
iv. WIKI (formatted for Logos Wiki) -- [[Beholder: Abraham › Places: Mamre (campsite) by Verse in NABRE (Bible Browser) >> https://ref.ly/logos4/BibleBrowser?res=LLS:NABRE&context=Verse&facets=CategoryId=Theophanies^2|CategoryTitle=Beholder|TermId=bk.#Abraham|TermTitle=Abraham;CategoryId=BkPlace^1|CategoryTitle=Places|TermId=bk.@Mamre|TermTitle=Mamre%20(campsite)]]
v. RL (formatted for Reading Lists) -- [[Bible Browser >> https://ref.ly/logos4/BibleBrowser?res=LLS:NABRE&context=Verse&facets=CategoryId=Theophanies^2|CategoryTitle=Beholder|TermId=bk.#Abraham|TermTitle=Abraham;CategoryId=BkPlace^1|CategoryTitle=Places|TermId=bk.@Mamre|TermTitle=Mamre%20(campsite)]] | Beholder: Abraham › Places: Mamre (campsite) by Verse in NABRE
vi. DATA (current milestone data) --BibleNABRE:Ge 18:1
vii. Ctrl+Alt+C (keyboard shortcut) -- https://ref.ly/logos4/BibleBrowser?res=LLS%3aNABRE&context=Verse&facets=CategoryId%3dTheophanies%5e2%7cCategoryTitle%3dBeholder%7cTermId%3dbk.%23Abraham%7cTermTitle%3dAbraham%3bCategoryId%3dBkPlace%5e1%7cCategoryTitle%3dPlaces%7cTermId%3dbk.%40Mamre%7cTermTitle%3dMamre%2520(campsite)
Close panel (Ctrl+F4) is equivalent to the close icon (x) on the right of the panel tab.
At this point we have reached the tool itself. Note that my Program Settings include:
Show Information Tool Tips: Yes – “Verbum shows a short status bar popup in the lower left of some resources, especially those with lemma and morphology tagging. Turn this setting to Yes to display these helps, and No to hide them[2]”
Show the Notification Bar: Yes – “When Verbum is updating or indexing, a yellow bar may appear across the top of the main application window. This setting controls whether to show that bar or not.[3]”
Show Visual Cues: Yes – “A visual cue is a short animated burst of color that appears to draw the eye to a portion of the screen, especially in resource locations. This is especially useful when following a hyperlink to an open panel and the linked location is halfway down the page. Yes shows these cues, and No turns them off.[4]”
Show Selection Menu: Yes – “This setting controls whether the Resource Text Selection Menu is displayed.[5]”
Show Help Cards option is not available in Verbum but is in Logos.
Your results may differ from mine due to these settings.
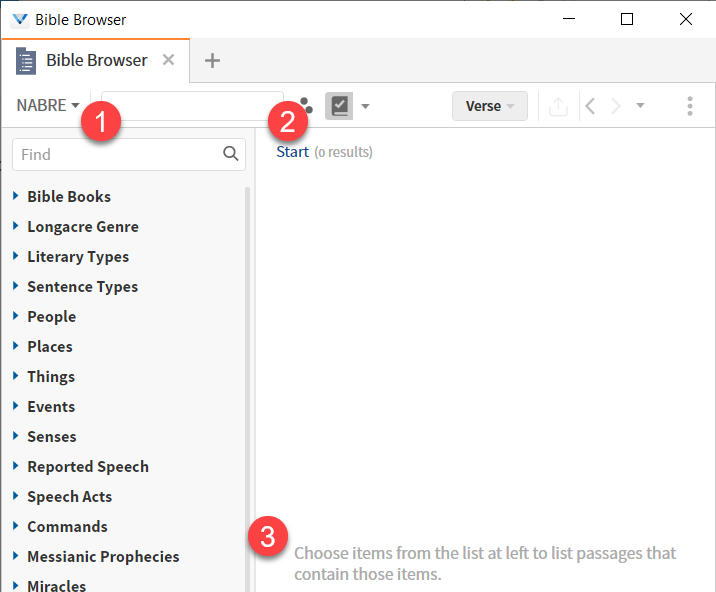
The Find box allows one to enter text and have all matching values in all the facets become visible for selection.
Start has two related functions:
When there is a breadcrumb history, clicking on start clears the entire list while click an “x” removes only that entry.
Start is the first entry in the breadcrumb history. Remember that each facet selected is independent of all other facets. The selected facets are strung together in a logical AND relationship.
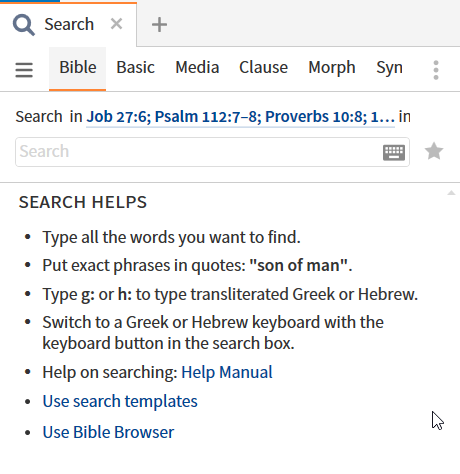
The instructions for the tool are displayed when the selection area is blank.
Using the selection facets used above, some of the features of the selected Bible passages are shown below:
Mouse-over à gutter line
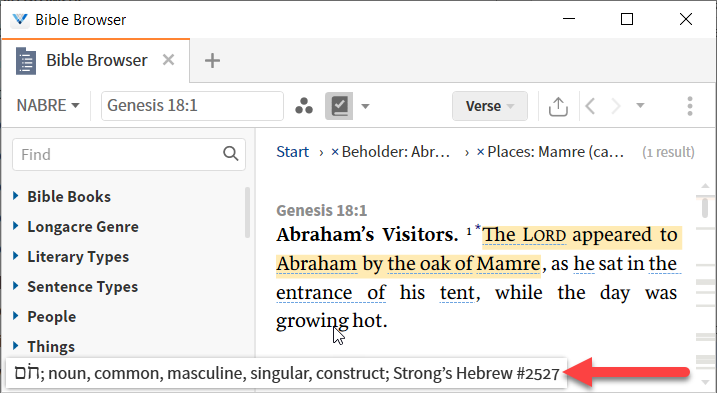
The gutter line shows the basic morphology parsing, Strong’s numbers etc. The precise data varies by resource.
Selection à mouse over à Resource Text Selection Menu
From Verbum Help:
[quote]The Resource Text Selection Menu is a pop-up menu that provides quick access to several tools and features when selecting text within a resource. The options presented are contingent upon the resource and the amount of text selected.
Note: You can turn off the Selection Menu in Program Settings. There is a yellow notification banner on the Selection Menu with a link to open Program Settings, the notification can be dismissed by clicking the x on the banner.
The Command Bar
• Copy — This command behaves the same way that the keyboard shortcuts CTRL/CMD+C does.
• Search — This command will open up a search panel.
• Study — This command will in most cases launch a guide appropriate to the context.
• Look up — The Look up command will open up your prioritized dictionary or lexicon.
• Share — This command will open up the Media Tool to allow the sharing of quotes and Bible verses on social media.
• Text Comparison — This command will launch the Text Comparison Tool on the selected text of a versified resource.
• Context Menu — Clicking on the three dots at the end of menu will open up the Context Menu.
The Annotations Bar
• Add note — This will add a note to the Notes Tool.
• Highlighting Styles — This option makes the last six Highlighting styles used available. There will be four options if there are already annotations present.
• Open Highlight Tool — This option will open the Highlighting Tool.
• Edit notes — This option is available when there are annotations present, it will open the Notes Tool.
• Remove Highlighting — This will remove Highlights and Notes from the text.
The Copy Bible Verse Bar
• Styled — This option uses the last style selected from the Copy Bible Verses Tool.
• Lines — This option copies the reference and text as individual lines.
• Text Only — This option copies just the text selected.
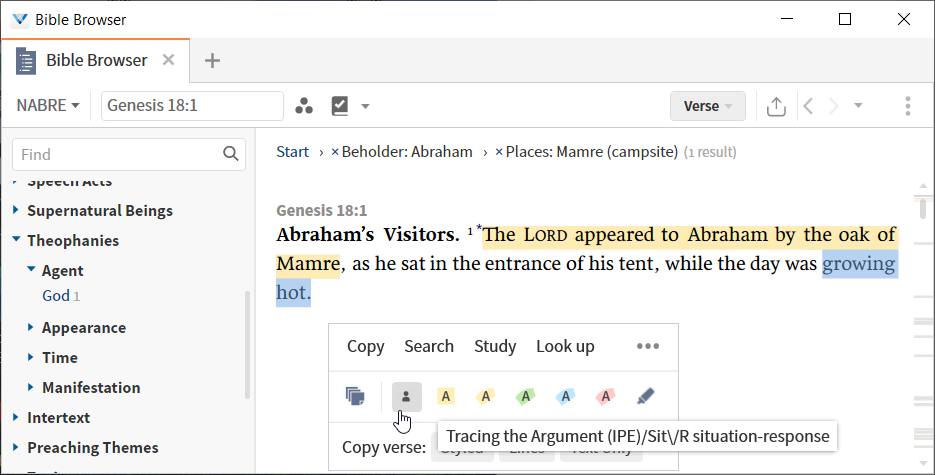
Note Tracing the Argument is a personal palette.
Double-click on word à Open Dictionary
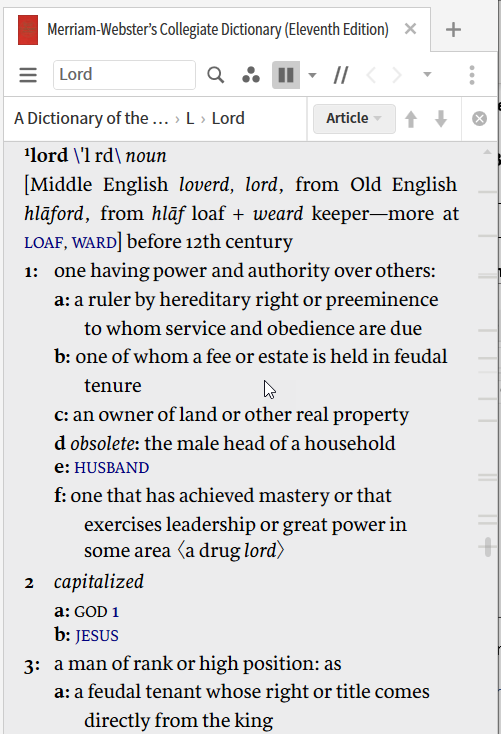
A double click on a word will bring up the highest priority dictionary containing the word as a headword.
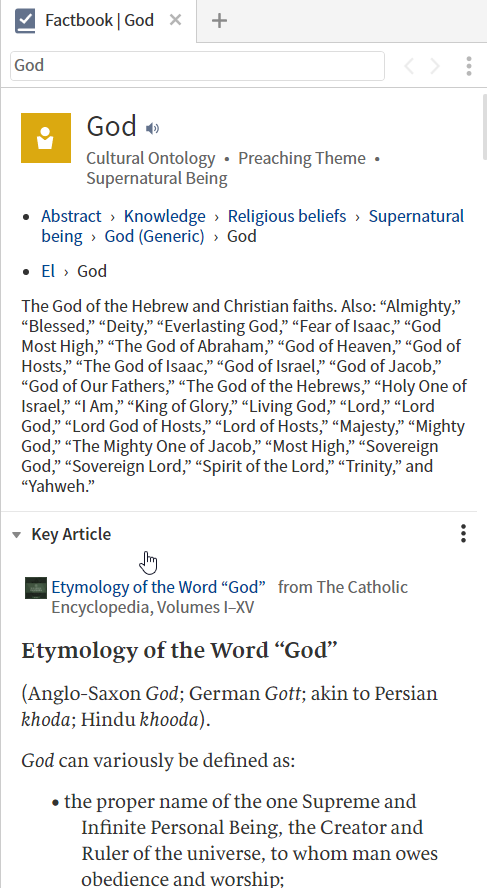
Factbook Visual Filter à Mouse over à Information Card
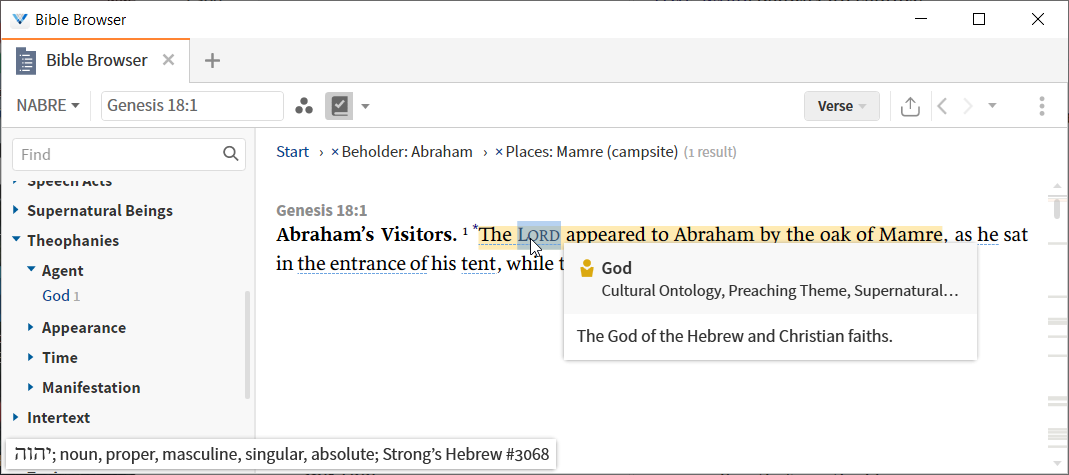
The content of the Info card varies by type. Here we get a supernatural being icon, a name, Factbook categories for which is it is coded, and a brief description.
Factbook Visual Filter à Click à Open Factbook
F7 à Compare Versions
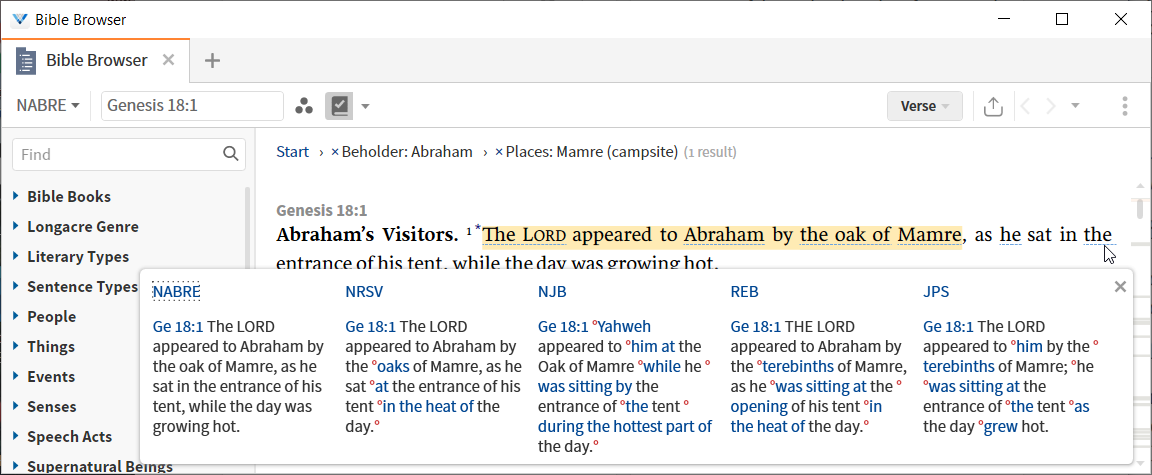
The versions to be compared is drawn from the last settings in the Compare Versions Tool.
Right-click on word or selection à Context Menu
Please tell me you have seen many Context Menu examples over the last few weeks.
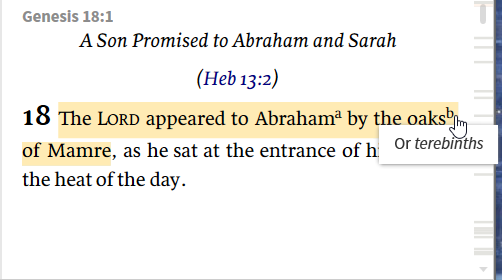
Mouse-over footnote indication à Footnote contents
[1] Verbum Help (Bellingham, WA: Faithlife, 2018).
[2] Verbum Help (Bellingham, WA: Faithlife, 2018).
[3] Verbum Help (Bellingham, WA: Faithlife, 2018).
[4] Verbum Help (Bellingham, WA: Faithlife, 2018).
[5] Verbum Help (Bellingham, WA: Faithlife, 2018).
 Verbum Help (Bellingham, WA: Faithlife, 2018).