PRECEPT MARKINGS

Pamela Bendall
Pamela Bendall Member Posts: 8 ✭✭
edited December 2024 in English Forum

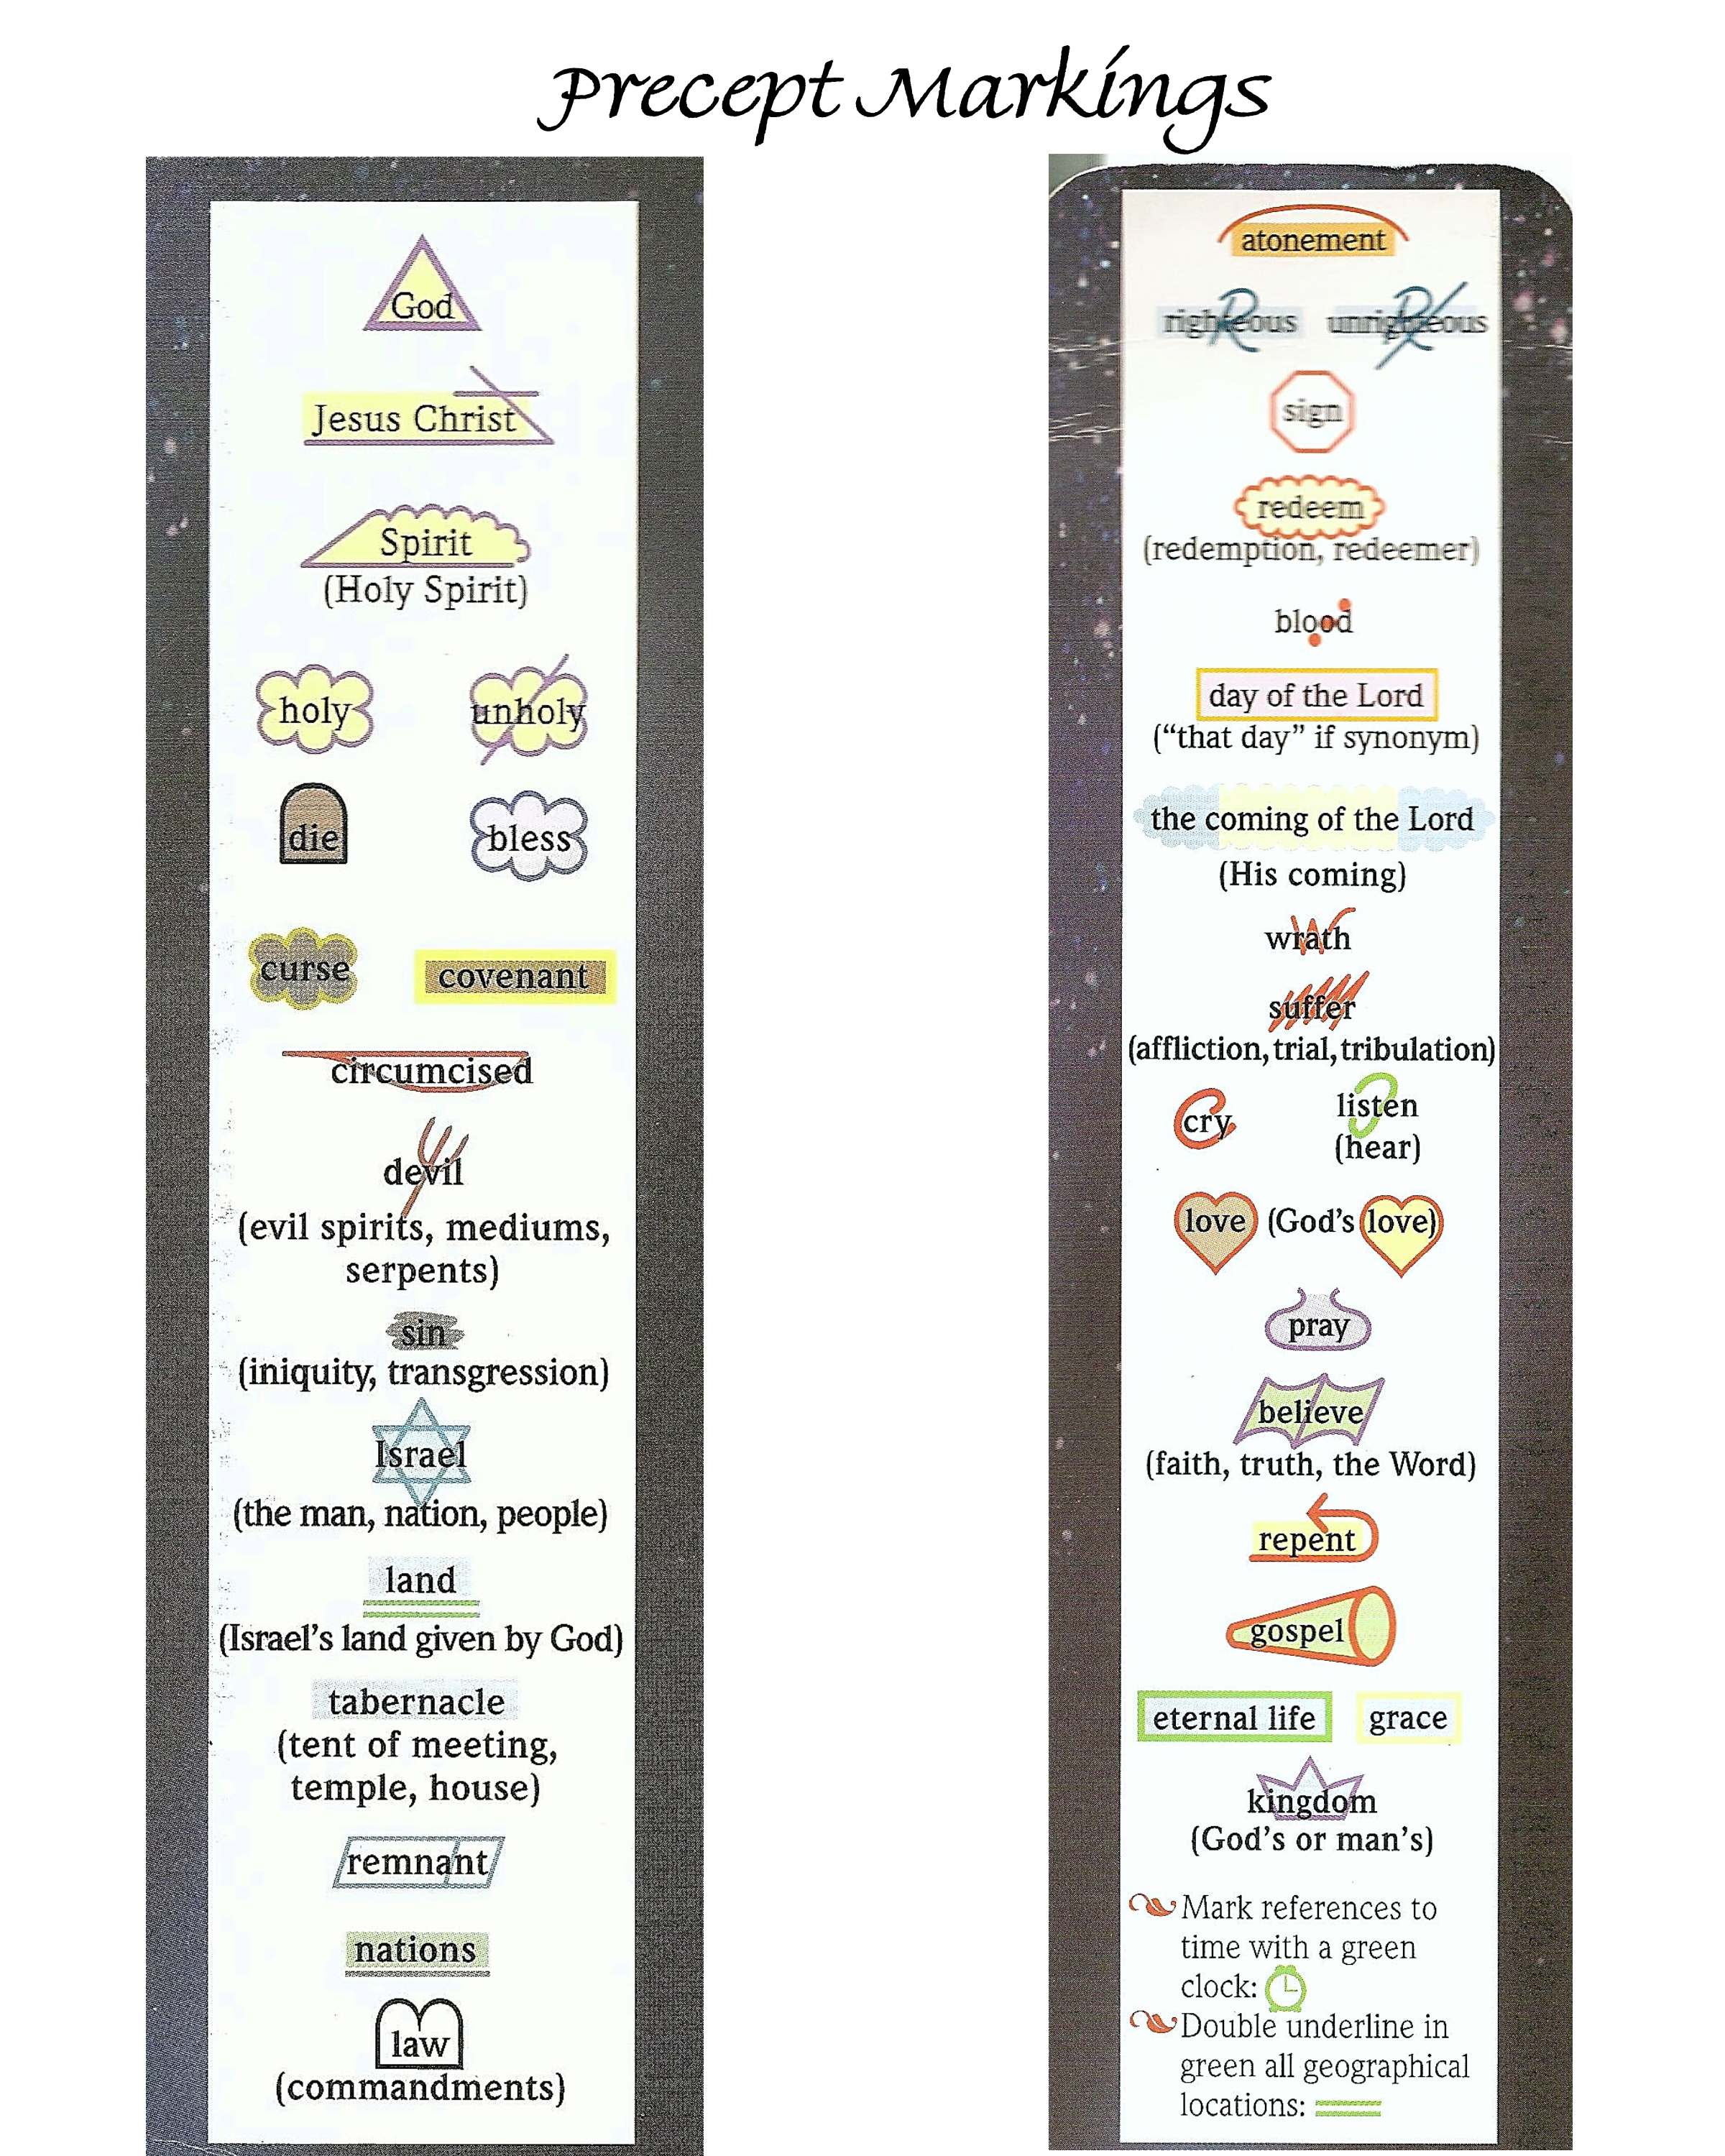
I am so thankful for the marking your have added to the new upgraded program. This saves me many steps while working on my bible study.  However, there are many more in the precept study guide.   I have attached a copy of them. could you please add these markings under the Precpet Marking sections.  or tell me how to make them and save for future use.

Thanks so much

Pamela Bendall
image

Comments

  • Ron
    Ron Member Posts: 1,229

    [Y] Hi Pamela.  May I suggest that you go to http://logos.uservoice.com and vote for the item "Complete the set of Precept Symbols"?  It is currently the 18th suggestion on the first page with 187 votes.  This is one method that Logos uses for prioritizing requests for improvement and features in the program.

  • steve clark
    steve clark Member Posts: 3,591 ✭✭✭

    Hi Pamela,

    or tell me how to make them and save for future use.

    If you draw your own symbols in a Paint program (if you don't have one, i use Paint.net for windows) using the zoom as you draw, you can then save them as small picture files (.jpg or .png) to your computer's hard drive.

    Here are a couple that i created from your image above:image imageimage  

    After you have created some of your images you can follow the directions below to add them to your Highlighting in Logos4

    image

    1. If you do not have a custom palette, then Right-click on an existing palette in Logos4's Highlighting tool, then in the drop down menu click on Create a new palette. After it is created you will need to name it.

    2. Now if you Right-click on your new palette and in the drop down menu click on Create a new style, you will be able to add one of your images that you created as a new highlighting style.

    image

       2a. Now Logos4 opens a new style editor. First you will want to name your new style.

       2b. Next click on the triangle next to image to expand it. Then click on the gray box to select which image to add to this new style.

       2c. Logos4 will show you some default images, but to add ones that you have built or have on your computer's hard drive click on the link Choose a file... at the bottom. Logos4 will show you a File location box, just use it to locate your image files and select it.

       2d. Now you will need to close the style editor by clicking on save. This will return you to the Highlighting tool in Logos4.

    3. You will need to repeat step 2 for other images that you want to create styles for.


    Then after you have added your new styles you can use them as you would other highlighting styles.


    image


    QLinks, Bibl2, LLR, Macros
    Dell Insp 17-5748, i5, 1.7 GHz, 8G RAM, win 8.1